On March 3rd, 2012 my then boyfriend Aaron proposed to me in
front of the Arch de Triomphe in Paris. At that moment I held naïve beliefs a
year and a half engagement would be long one. Boy was I wrong. This weekend we
were married at the State Capitol in Harrisburg, PA among the photographs my
late father took and family and friends. I must say the day was just about
perfect. But I definitely had my work cut out for me in planning it.
We don’t have all of photos yet but here are a few sneak peeks
from our amazing photographer, Kalim including our DIY projects.
In my case planning a wedding takes a village, six bridesmaids, and a coordinator. This wasn't a "DIY" wedding but we also had several do-it-yourself accents.
chalkboard direction signs
planted teacup favors with personalized seed
packets
Photos to come: wedding cake, centerpieces (except flowers)
And fascinators...
As more of our professional photos become available, I’ll
offer more DIY instructions and tips.
Today, here was one of my favorite accents, which remains
one of the easiest.
Worth
it:
Fascinators
for myself and all my bridesmaids
When planning an “English” wedding, you must
have hats and fascinators! Buying fascinators can run you anywhere to a
few hundred dollars just for one. In
order to makes ours a little easier to assemble, I purchased pre–maid clips
from A.C. Moore for our base. These worked well because they provided both an
alligator clip to attach to the hair as well as a smooth front for the
fascinator to attach more feathers towards the back.
I was able to purchase these
on clearance for only $1.75 each, but you can get them directly from the maker’s
website, still making your fascinator much cheaper.
I also found the best deals for different types of feathers
and birdcage netting on Etsy. Shop around and should be able to get several different
types for low-cost per fascinator. Depending on quantity of fascinators, each
one will cost as little as $4-5.
1 La Liberi White Feather Blossom Pin & Clip Flower (or
alligator clip with back and more feathers)
At least two types of assorted feathers, 1 larger, 1 smaller
(10-15)
1 square foot of birdcage netting whether French, English,
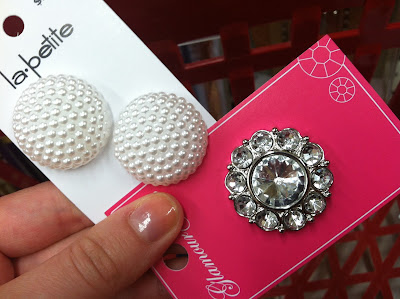
or Russian style; cut into pieces for desired look1 button of choice
Hot glue gun an glue
Directions:
Using La Liberi clip, remove safety pin from the back,
leaving only the alligator clip.
Arrange desired feathers and desired amount of netting together the way you
would like them to appear. Such as larger feathers in the back, netting in
between, and smaller wispier feathers right behind the La Liberi clip. Use hot
glue gun to attach feathers and netting, making sure they are enough glue to
hold. Allow glue to cool between layers.
Once layers are set, use the hot glue gun to attach desired
button in the front middle of the fascinator along with any other desired
feathers or attachments.
Once cooled and dried, your fascinator is ready to where!
For special occasions allow whomever is doing your hair to place the
fascinator.
All of our fascinators were a little different, that made it
more fun! These are great way to add a little English and vintage elegance to
any occasion.
More DYI wedding tips to come! Any preference on what to see
next?
Love,
The Married Cuisiner


No comments:
Post a Comment